Little Dipper’s Homemade Barbeque Sauce

Success for the Little Dipper!


When I was little, I lived in a small rural farming town in southern Minnesota where my dad served as a pastor of a small United Methodist church.  My grandparents would come and visit us and on those occasions, we’d frequent one of the two restaurants in town.  More often or not, we’d opt for “Daniel’s” over “Burger King”.  It was on one such excursion to “Daniel’s” that I received one of my most enduring nicknames.  I couldn’t have been more than three.  I was sitting next to my Grandpa Marlowe when I noticed him place a large blob of ketchup on his plate.  Seeing my gaze, he responded by plopping a large dollop on mine as well.  Giving me a mischievous smile he said “Look, Alli, like this!”  With that he dipped his finger into the ketchup and licked it off.  I was spell bound.  And the rest is food dipping history.

Growing up, I dipped all of my food.  To a disgusting event.  When there wasn’t food to be dipped, I would eat the condiment with a spoon or by scooping it up with my fingers.  “Little Dipper” was a charitable term for what became an obsession.  Alli had to have her sauce!  Even as an adult I would ask for 3-4 BBQ packets- not one, my own ketchup bottle- not a small cup and covered everything I could think of with a thick layer of sweet and spicy goodness.

SCD was a rude awakening.  My second day after the intro diet, I tried to make BBQ and failed miserably.  I wasn’t deterred and have made at least 20 variations of BBQ over the past year.  While I may not have tried every SCD recipe out there, I have sampled a great deal of them to frustrating ends.

Enter the hero of the story.  He scales large buildings in a single bound.  He consumes large tombs of theology without falling asleep once.  He keeps his jokes about yoga to a minimum AND he likes cats better than dogs.  But even more significant than all of these virtues is the fact that he alone created the perfect SCD BBQ sauce.  Without Mike Niebauer, Little Dipper’s Homemade Barbeque Sauce would not exist.

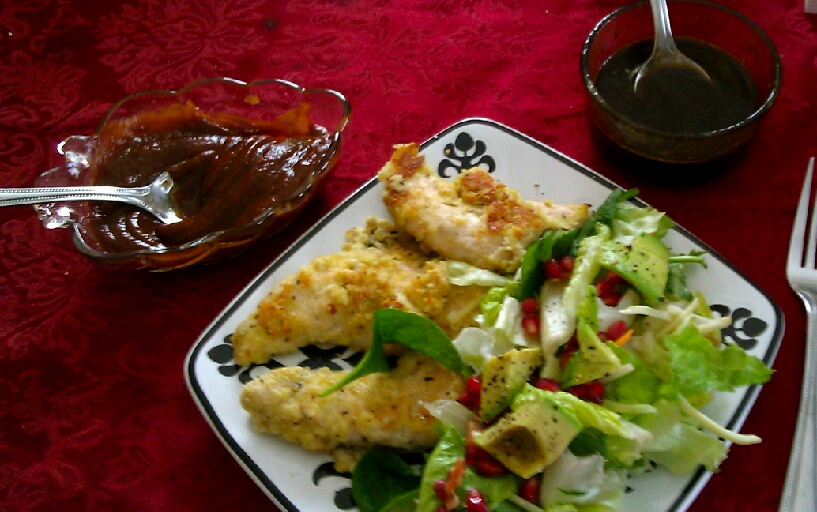
He gave me the recipe and the first batch for Christmas this past year.  It is the perfect combination of sweet and savory with a little bit of kick.  Delicious and authentic tasting, I wouldn’t be able to tell it from commercial BBQ.  It is in fact, the perfect BBQ sauce.  Best of all, it’s incredibly simple to make!  Mike Niebauer, you got it goin’ on.

Little Dipper’s BBQ Sauce 

  • 1 Can of Organic Tomato Juice (32 oz each)

  • ¾ Cups Apple Cider Vinegar

  • 1 tsp. onion powder

  • 3 ¾  tsp. salt

  • ½  tsp. all spice

  • ½  tsp ground cloves

  • ½  tsp. cinnamon

  • ½  tsp. garlic powder

  • 1 bay leaf

  • 1 ½ Tlb. Yellow mustard

  • 1/8  tsp paprika

  • ¼ tsp ground cayenne pepper

  • Dash of chili powder

  • 1/3 cup honey

  • 1 ¾ tsp. liquid smoke (I use Wright’s, it’s SCD legal)

Directions:
1. Combine all ingredients, except for honey, liquid smoke in a large pot.
2. Simmer for 3-4 hours until very thick, stirring occasionally, more so as it thickens.
3. Turn off heat. Remove bay leaves.
4. Add liquid smoke. Stir well.
5. Transfer to a blender and puree well.

Advertisement

Pineapple and Prosciutto Pizza with Cauliflower Crust

SCD Legal  Hawaiian Pizza

SCD Legal Hawaiian Pizza

Game night is not game night without pizza.  For the past year, I have tried over ten different ways to recreate our past carb loving, cheese indulging, gut wrenching, no holds barred game night with very little success.  While our game closet continue to over-floweth with pretty much every Euro game (and expansion) out there, we usually opt for ordering Papa John’s for Mike and the guys while I eat something awesome.  Like a salad.

The problem with SCD legal pizzas is almost universally the crusts.  Almond flour is too dense, has the wrong texture and gets too soggy in the middle even if it is pre-baked.  A combo of different nut flours gives a dry, lifeless crust that tastes bland and biscuitty.  I honestly thought I just wouldn’t be able to enjoy pizza ever again.

Not any more!  I’ve also been reading about cauliflower crusts for the past year but been too skeptical to try it out.  Shame on my doubting heart, it is AWESOME!  This recipe is by no means terribly original as I’m sure it’s an amalgamation of other recipes but it is incredibly tasty, crunchy, and crusty.  Welcome to my version of Hawaiian pizza!

Ingredients (cauliflower crust):

  • 3 cups finely grated cauliflower (about 1 medium sized head)
  • 1 egg
  • 1 cup cheese (I used 1/2 adagio and 1/2 muenster)
  • 1/2 teaspoon onion powder
  • 1/2 teaspoon garlic powder
  • 1/4 teaspoon Italian blend (I mix evenly basil, thyme, sage and oregano)
  • 1/2 teaspoon salt

Ingredients (pizza filling):

  • 1/2 cup pizza sauce (I used SCD legal Lucini’s.  They carry it at Whole Foods)
  • 1 cup cheese (again, I used 1/2 adagio and 1/2 muenster)
  • 1 can pineapple (make sure they are SCD legal and canned in their own juice)
  • 6 strips of prosciutto (make sure to look at the ingredients as many contain illegals.  Trader Joe’s carries a legal type)

Instructions:

    1. After washing the cauliflower, use a hand grater to grate three cups of cauliflower into an oven safe bowl.  You could use a food processor but I find that it makes the cauliflower “wetter”.
    2. Pre-heat the over to 450 degrees and put the cauliflower in until it is tender but not mushy (about 5-7 minutes once oven is warm).  You could use a microwave for this but I think microwaves are weird so…
    3. Take cauliflower out and combine all ingredients in the bowl until well mixed.  Grab a pizza pan and spread out your parchment paper.
    4. Scoop your cauliflower mix onto the parchment lined pizza pan.  At this point, don’t expect it to feel like dough.  It won’t really be sticking together enough for you to form it into a ball and that’s ok!  Using your hands, fashion it into a circle on the parchment paper so that it looks like a pizza crust.
    5. Pop it into the over for 15-17 minutes until the crust is golden brown.
    6. Remove it from the oven and spread pizza sauce and the rest of the ingredients over the pizza.

Turn the oven up to broil and put the pizza in for 3-4 minutes until the cheese is bubbling.  Remove and serve right away

Before the oven

Before the oven

After the oven

After the oven

Before the cheese

Before the cheese

After the cheese

After the cheese


It turned out delicious.  Both Mike, Kara and I thought that if you didn’t know it was cauliflower, you wouldn’t have been able to tell!


Happy gaming and happy pizza night!

Surviving February: Slow Cooker Pineapple and Chili Pulled Pork

February is hands down, the worst month of the year for mid-westerners.  It manages to simultaneously never end and speed by, giving the poor chump stuck in a mid-west induced haze of flu, stress, and blizzards, the feeling of slow motion whip lash.  You know it’s happening, but you can’t do anything about it.  Mid-westerners, we are the true survivors.

IMG_2081

Fortunately, February also gives me this frenzied craving for all things tropical.  I window shop for dresses without sleeves and blush inducing lengths.  At work, I keep my sanity while holding on the phone by clicking on EVERY SINGLE travel “get-away” package that I see.  And I make a series of tropical inspired dishes that give me the illusory feeling of controlling my own destiny.  Maybe if I eat enough pineapple. I too will win Travelocity’s “Romantic Caribbean Get-Away” sweepstakes.

It hasn’t happened.  But March is here.  It’s sunny today and I am happy to post pictures of mouthwatering Caribbean spiced pork turned mid-western by virtue of the crock-pot.  I snagged the recipe off of paleopot.com and was glad I did.  The sweetness of the pineapple and the heat from the chilies made me ignore the blizzard outside.  I was so absorbed in the meal I didn’t even notice the snow plow, dutifully stacking snow around my little Vibe, making it impossible to leave.

Maybe getting stuck inside isn't such a bad thing after all...

Maybe getting stuck inside isn’t such a bad thing after all…

Paleo Candy Bars

Mike and I ate so so so bad B.C. (before Crohn’s)  We dated and were engaged long distance and when I came to visit, we’d spend the whole weekend eating fake chinese (fasian), fried everything and sugar galore!  When we went to movies, we’d sneak in at least 3 different types of candy bars and multiple soft drinks.  Honestly, it was awesome.

But eating like that has a high cost (Crohn’s being just one of them) and since starting the SCD, I’ve tried hard to monitor my sugar intake.  However, going to the movies bums me out.  I miss my candy and soft drinks!  Last night, Mike and I decided to go to “Argo” and I decided to do something about the candy situation.

IMG_2042

As a disclaimer, eating these on a regular basis isn’t a part of a healthy, whole living plan.  But once in a while, man does it hit the spot!

Paleo Candy Bars:

  • 1/2 bar 100% Cacao (about 1/2 cup)
  • 1/3 cup coconut oil
  • 1/4 cup raw, unfiltered honey
  • 1 tsp vanilla extract
  • 1/4 cup roughly chopped roasted almonds
  • 1/4 cup raisins

Instructions:

  1. Heat coconut oil, honey and raw cacao over medium heat in small sauce pan until all ingredients have melted.  Stir to prevent burning.
  2. Add vanilla extract and remove from heat.
  3. Make sure to pre-soak your almonds!  Roast at 250 degrees for 2-3 hours with a sprinkling of sea salt.
  4. Add almonds to your food processor and pulse until roughly chopped.
  5. Mix almonds and raisins into the chocolate mixture.
  6. Pour chocolate mixture into a cold ice tray, filling about 1/2 of the way up.
  7. Freeze for at least 1 hour.
  8. Crack the tray like you would ice.  They fall right out!  Store in the fridge to keep from going soft but they will keep their shape at room temperature.

IMG_2043IMG_2038

Indian fried “rice” with Chicken Coconut Curry

At least two times a week I am surrounded by the delicious, pungent and seductive smells of Indian spices.  As a medical social worker at a refugee resettlement agency, I work with a lot of Bhutanese clients.  These are the Lhotshampa people, ethnically Nepali people who were forced out of Bhutan and have lived for over 20 years in refugee camps in Nepal.  I just love working with them.  They bring with them an incredibly tight knit community, amazing hospitality, great work ethic and amazing cooking (among other things).  A couple of times a week I will go to do a home visit and spend an hour or so inhaling the most incredible smells of their cooking.  They share a lot of the spices I commonly associate with Indian cooking.  B.C (before Crohn’s), I ate my weight in Nepali food– huge mounds of white jasmine rice,  Aloo Achar (potato salad) and lentil curries.  So delicious!  Now I have to refuse the hospitality of my hosts using my limited Nepali to explain that I’m so sorry (mauf garnus) but I have food allergies!  Explaining the SCD bacteria theory is a little beyond me for now.

A post by Jenni from Urban Poser on Indian “fried” rice made me think about trying to recreate a basic Nepali curry recipe.  I followed her instructions for making the rice pretty closely.  More Nepali delicacies to follow but for now, try this out!  Make sure to look at Jenni’s original recipe as well.  Her photos are out of this world!

Indian “Fried” Rice:

  • 1 medium head cauliflower
  • 3 tsp coconut oil
  • 1/2 medium yellow onion, finely chopped
  • 1 serrano chili, finely chopped
  • 1 medium sized carrot, chopped in small pieces
  • 1 cup peas
  • 1 tsp cumin
  • 1 tsp whole yellow mustard seed
  • 1/4 tsp nutmeg
  • 1/2 tsp corriander
  • 1/8 tsp chili powder
  • 1.5 tsp salt
  • 1/2 tsp ground pepper
  • 1 tsp honey
  • 2 TBSP cilantro, finely chopped
  • 1/2 lime, squeezed

Instructions:

  1. Wash and chop cauliflower and put it in food processor.  Pulse until it resembles rice.  See Jenni’s recipe for recommendations on hand grating.
  2. Heat 1 TBSP of coconut oil in 10 inch skillet.  Once it’s hot, put a layer of the pulsed cauliflower over the oil.  Watch it carefully and scrape to keep from burning.  When it starts to brown and almost burn, remove from heat and put on the next layer, adding coconut oil as needed.  Keep warm.
  3. Once finished, add 1 TBSP of coconut oil.  Once hot, add carrots and serrano chili.  After 2 minutes, add chopped onion.  Stir to keep from burning.  After 5 minutes, add peas and lower heat.  Add the “rice” back in.
  4. Mix all the spices together and stir.  Once well combined, add to the hot “rice” mixture and stir in 1 tsp honey.
  5. Finish with 2 TBSP of cilantro and squeeze lime over it.
Indian fried "rice"

Indian fried “rice”

Coconut Chicken Curry:

  • 1lb boneless skinless chicken breast
  • 3/4 tsp salt
  • 1/4 tsp black pepper
  • 2 medium carrots
  • 1/2 medium onion
  • 3 peppers (I use 1 yellow and 2 smaller red)
  • 2 tsp curry powder*
  • 1/2 cup golden raisins
  • 1 can coconut milk (Make sure it is SCD legal.  I use Aroy-D, Trader Joe’s or Natural Valley)
  • 2 tbsp cilantro (or more!)

Instructions:

  1. Cut chicken into 1 in pieces.
  2. Combine salt and pepper.
  3. Coat chicken in 1/2 of it.
  4. Cook chicken in skillet with coconut oil.  Set chicken aside.
  5. Add more oil to skillet and saute carrots, peppers, and onion for 5 minutes or until tender crisp, stirring occasionally.
  6. Stir curry powder, raisins, coconut milk, and remaining salt/pepper mixture and add to skillet.
  7. Add chicken and simmer for 3-5 minutes or until sauce begins to thicken.
Simmer for a few minutes to thicken

Simmer for a few minutes to thicken

*Curry powders can very from company to company.  Make sure that you know all of the ingredients in yours!  I recommend Penzey’s or The Spice Hunter.

Serve while hot!  The cauliflower rice will absorb the coconut milk so don’t combine, rather pour over to keep the rice texture.  Dari Ramro (so good)!

IMG_2034

Raw Walnut Tacos, Spiced Melon Soup and Watermelon Mojito Popsicles

I’ve been waiting for a good night to blog about these particular recipes.  We tried them almost a month ago and I took pictures, intending to put them up but then got distracted by other dinners!

Well, I got my chance tonight because I BOMBED with a pizza.  The sauce was too sweet, didn’t go with the aged cheddar and was all around average.  But the Greek Vinaigrette that I whipped up was notable so we didn’t starve and I’ll post that recipe later.  BUT, it’s a good night to flaunt someone else’s recipes since mine averaged a B- for the day.

Ever since Coco of Roostblog posted this, I’ve been dying to try it!  Her meal included the following recipes:

Tacos- made with lettuce wraps and walnuts, chopped and spiced to taste like meat.

Spiced Melon and Avocado Shooters- Notable here is the combination of avocado, nutmeg, ginger and cayenne.

Cashew Sour Cream- Tasty on both tacos and chilled soup!

Watermelon Mojito Popsicles- Made by squeezing watermelon through a cheesecloth and mixing it with SCD legal light rum and fresh mint (fresh from my garden)!

In addition, I whipped up some easy guacamole and pico de gallo.  I think Coco bought hers from Whole Foods and while I love their stuff, it’s a lot less expensive to make my own.  The only real substitution I made was honeydew melon for cantaloupe since I really don’t like cantaloupe.  (I know, weird).

The whole meal was incredible and such a joy to consume.  The tacos were so filling.  I bought butterball lettuce from the Logan Square Farmer’s Market and was overjoyed at how good it was!  Pre-soaking the nuts is always annoying but the cashew sour cream and walnut filling made it worth it.  The whole meal is raw and incredibly good.

Loved sharing it with my loved ones.  Peace and health to us all.


Crust-less Quiche with Grain-Free Apple Spice Coffee Cake

Brinner!  It’s one of my favorite meals to make!  My friend Kara has informed me that brinner is a colloquial midwestern thing so just for clarification, brinner is breakfast for dinner.  And it’s great!

I made an old favorite and a new favorite for brinner.  The first was a crustless quiche with as many veggies as I could squeeze in.  The second was Danielle’s Grain-free Apple Spice Cofee Cake.  It was so delicious!  Dense and moist, better than the best bakery.  I made it without the coconut glaze because I couldn’t find any coconut milk without the guar gum.  Companies add it to keep the milk from separating but it’s a Sdkjfdkjg for people trying to follow the SCD.  I’ll admit, I ate a whole slice (and a half) before I mustered the necessary self-control to actually take a picture of it.  Reason #472 why I can never actually be a hipster.

Ok, the quiche.  The basic recipe is as follows:

Crust-less Quiche

5 eggs

1 cup SCD legal homemade yogurt

whip these two ingredients together and add salt and pepper to taste.

Ok, but here’s the deluxe version:

Alli’s KICKIN’ Crust-less Quiche

5 eggs

1 cup SCD legal homemade yogurt

whip these two ingredients together and add salt and pepper to taste

1 onion- chopped and sauteed

1 head broccoli- steamed and chopped

1 cup kale- chopped without the branches

5 strips SCD legal bacon (read: fried very crispy!)

Add these ingredients after you have whipped the first two.  Save the bacon grease and use it to grease the pan.  It infuses the whole dish with the sweet, salty taste of bacon.

Pre-heat oven to 350 degrees and cook for one hour.  Use foil on the edges to keep them from burning.

All in all, it was a dining success!  My sister told me I needed to add pictures of people enjoying my food (I assume so everyone knows it was actually edible).  My two favorite recipe bunnies sat with me in the fading light of this summer day and between the three of us, we demolished almost everything!  There was definitely a point during the last third of the coffee cake when my husband and I looked at each other across the table and agreed to finish it instead of saving it.  High-fives for occasional indulgences!

The last piece of coffee cake!

Pretty Kara and my awesome quiche!                                Proof that brinner makes everyone smile 


Teriyaki Pork Marinade

So here’s the thing.  It would be great if I could average around 2 hours of cooking every day and try multiple times before serving the recipe to my husband.  But, with a full time, stress-filled job, church stuff, vague attempts to stay in shape and you know, other things in my life- I can’t usually spare the time.

This Teriyaki Pork is an awesome, low maintenance recipe perfect for Wednesdays where everything but the weather is going slightly wrong.  (And I’m still blaming the weather, as the downed trees from last week’s storm is creating road chaos and annoyance).

I looked at a bunch of recipes and picked the best of each to create an SCD legal, flavorful marinade.  I whipped up the marinade over my lunch break and let the pork sit for 6 hours.  It was well saturated but I suspect another two hours wouldn’t have done it any harm.

Teriyaki Pork Marinade

1/2 cup Coconut Aminos

1/4 cup Water

2 TBLS SCD legal hard cider*

1/4 cup honey

1 tsp fresh grated ginger

1 clove mined garlic

Mixed the marinade and let the pork sit for up to 6 hours.  We used butterfly cut pork chops- my favorite cut!  Pre-heat oven to 375 degrees and let cook for 35-40 minutes.  I cooked it in my corning ware and kept the glass lid on to protect the meat.

*For the cider, I used J.K Scrumpy, which we buy from Binnys.  Check out what Elaine has to say about it if you’re concerned or this explanation for a better understanding of what makes hard cider SCD legal. Don’t trust all brands!  Make sure it contains less than 1% of sugar added and that you understand the fermentation process or that it’s fully dry.

We ate it over-looking the lake behind our house.  My husband ate yummy rye bread from an awesome polish bakery in Chicago.  He’s a hard working dude, and pretty exceptional so I don’t begrudge him the occasional non-SCD item.  A great easy meal for a crazy day!

Cabbage Salad

Cabbage Salad

Cabbage Salad

We’ve needed to add a little tang to our summer and Coco’s Cabbage Salad has been an awesome way to do that! We made it over the fourth as a compliment to our burgers and again this past weekend. Even my dad ate it, which given his proclivity to cheese sandwiches and pepsi, is a pretty large feat.

It has a vinaigrette with a nice zip to it. The toasted sesame is really evident but isn’t overwhelming. The honey makes it just sweet enough and is complimented well by the fruit.

The one difference in my recipe is that I substituted oranges for ripe nectarines and added lemon juice (1 TBS) to the dressing. I also added raisins. Make sure you pre-soak the almonds!

Coco’s pictures are so pretty! Check out the recipe! http://www.roostblog.com/roost/cabbage-with-almonds-blood-orange-and-ginger-vinaigrette-a-v.html

Continue reading

Basil Pesto with Zucchini Noodles

This past weekend I flew home to Minnesota to visit my family.  My mom rose to the occasion by helping me figure out yummy things to cook the whole weekend.  Yes, my mom is the best.  She came home from the farmer’s market with a gorgeous bouquet of sunflowers and two fresh bunches of basil.

We decided to make basil pesto.  After that first step, we debated for awhile what to pair it with.  We finally settled on sauted strips of zucchini, cut to look like noodles!  Four zucchinis and 30 minutes later, we had three bowls of steaming basil pesto and multiple high fives for our effort!

We used a carrot peeler to slice the zucchinis and then used a small knife to slice those slices in half.  It was the most time consuming part of the meal but worth it for the texture.  We used a blender to make the pesto.  We sauted the zucchini for about 5 minutes and then added the pesto and chopped up grilled chicken from the night before.  After a couple of minutes, we added the chopped up roma tomatoes and then served.  Insert Italian-ish kissing fingers in appreciation.


Basil Pesto with Zucchini Noodles

4 zucchinis

3 roma tomatoes

2 bunches of basil (or 3 cups)

1/4 cup olive oil (1 tbls for sauteing)

1/2 lemon squeezed

Salt and Pepper to taste

4 oz grilled chicken

Blend the basil, olive oil, lemon and s/p in the blender.  One thing to note: when I made it the next day, I added 1/4 cup parmesan and 1 clove garlic and it was delicious!  The fresh garlic is pretty rad.

Enjoy!